A deposit takes about a minute if you get one thing right: the network you choose in RedotPay must be the same network you send from. This guide shows every screen so you can follow along in the app.
Before you start
- A verified RedotPay account (identity check passed).
- Some USDT in a wallet or on an exchange that can withdraw on TRC20, BEP20, Solana, Arbitrum, opBNB, ERC20 or TON.
- At least 1 USDT to send, plus the network fee your exchange charges.
Step 1: Open Assets and tap Add funds
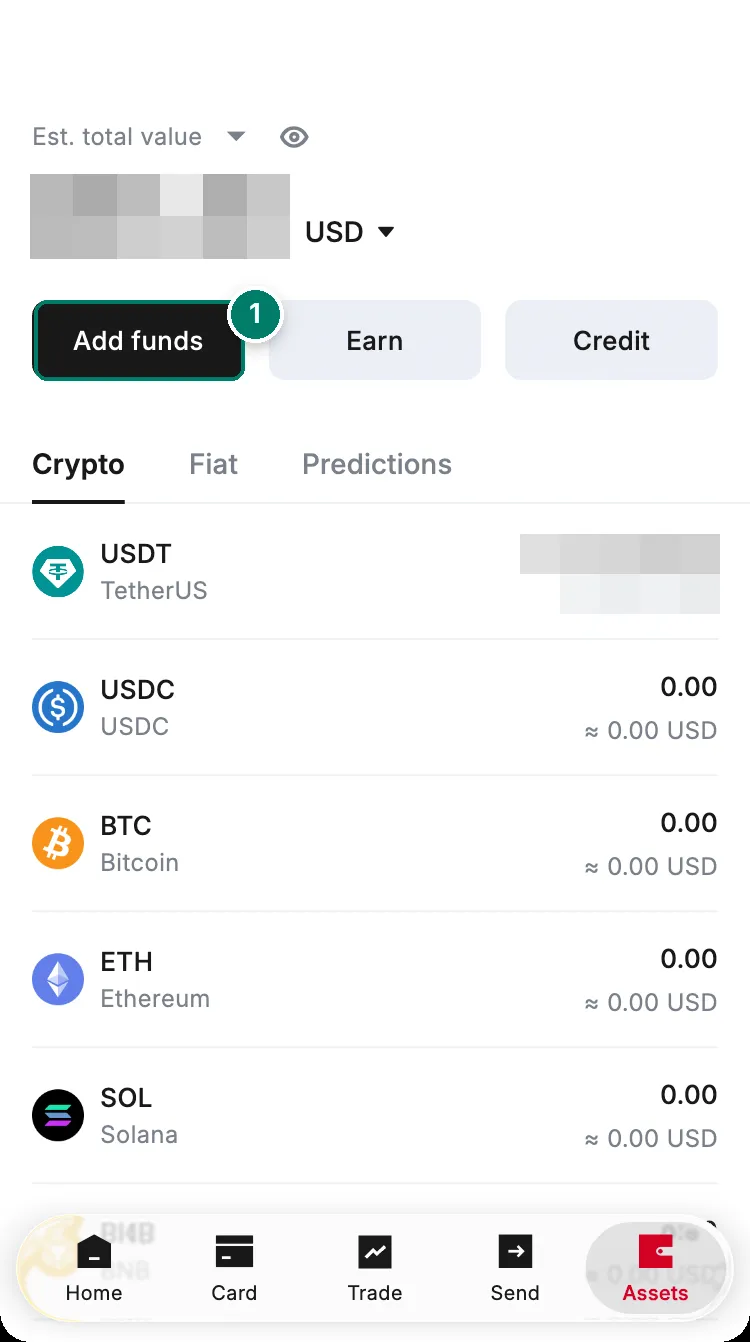
- Tap Add funds. The Deposit button on the Home tab goes to the same place.
Step 2: Choose USDT
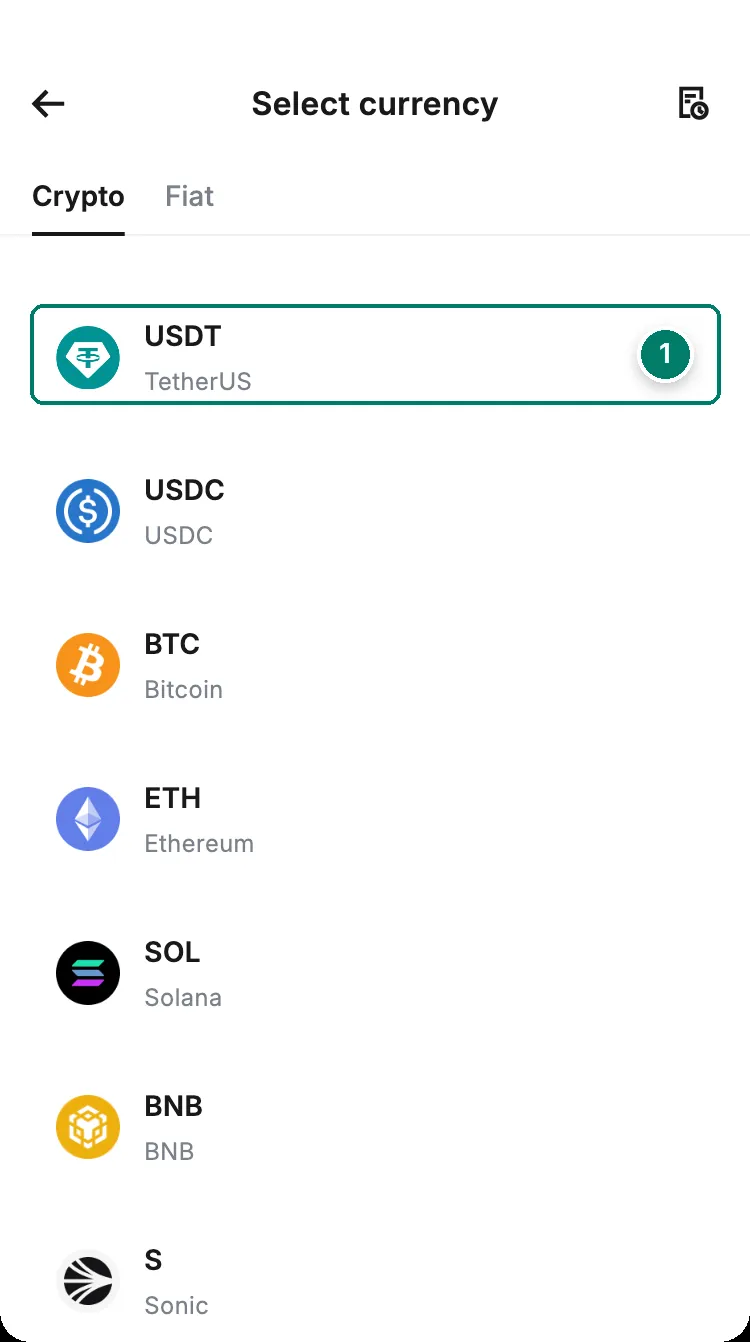
- Tap USDT. Each coin has its own address and network list, so don't reuse an address from another coin.
Step 3: Pick a deposit method
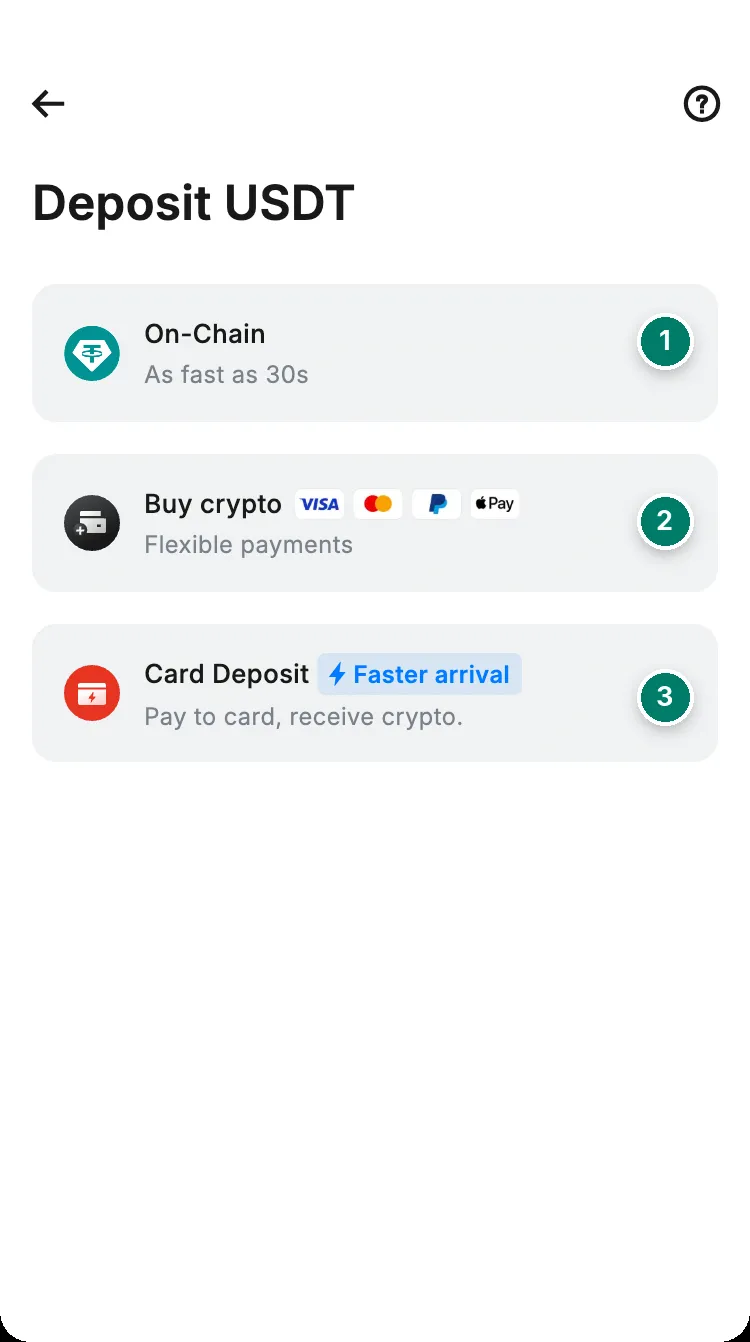
- On-Chain: send USDT you already own from a wallet or exchange. This guide follows this option.
- Buy crypto: pay a third-party provider with Visa, Mastercard, PayPal or Apple Pay and receive USDT.
- Card Deposit: pay with a bank card and receive crypto; the app marks it as the faster option.
Step 4: Choose the network, and match it on the sending side
The first time you open the network list, RedotPay shows this warning. It is the single most important rule of the whole process.
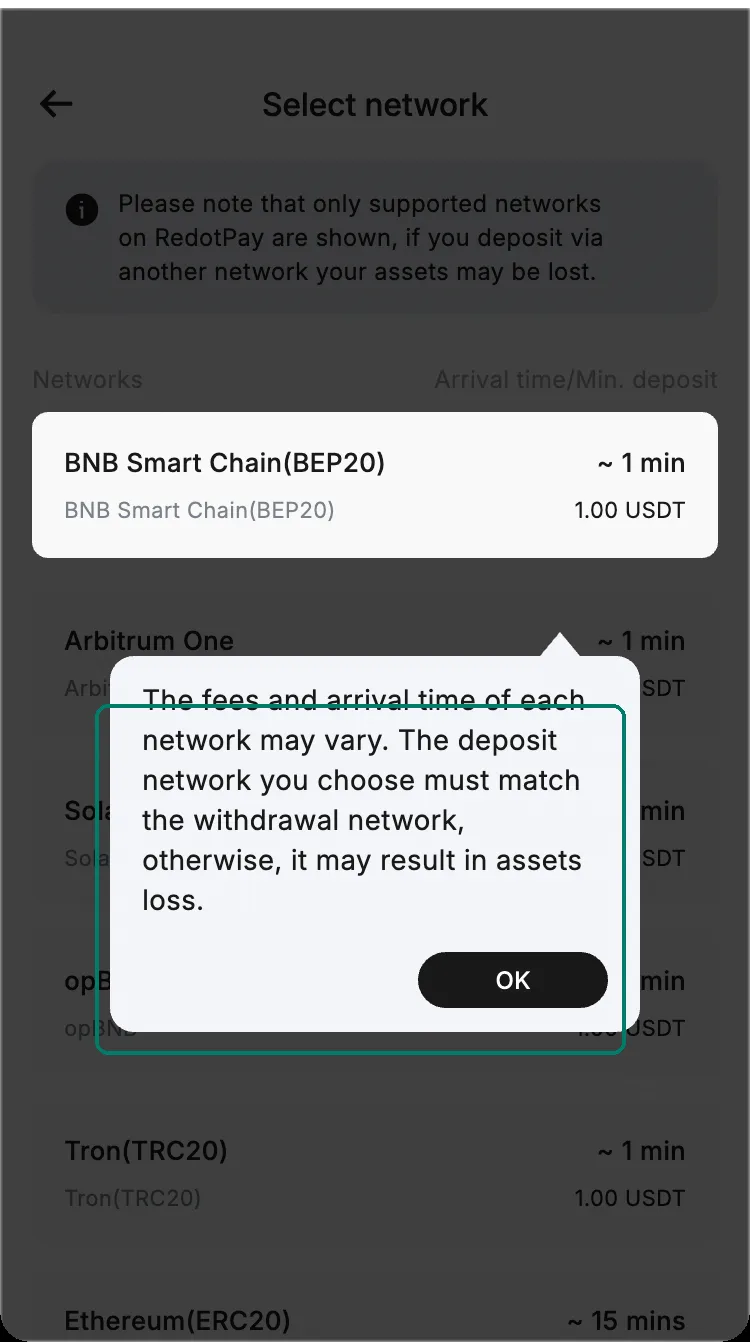
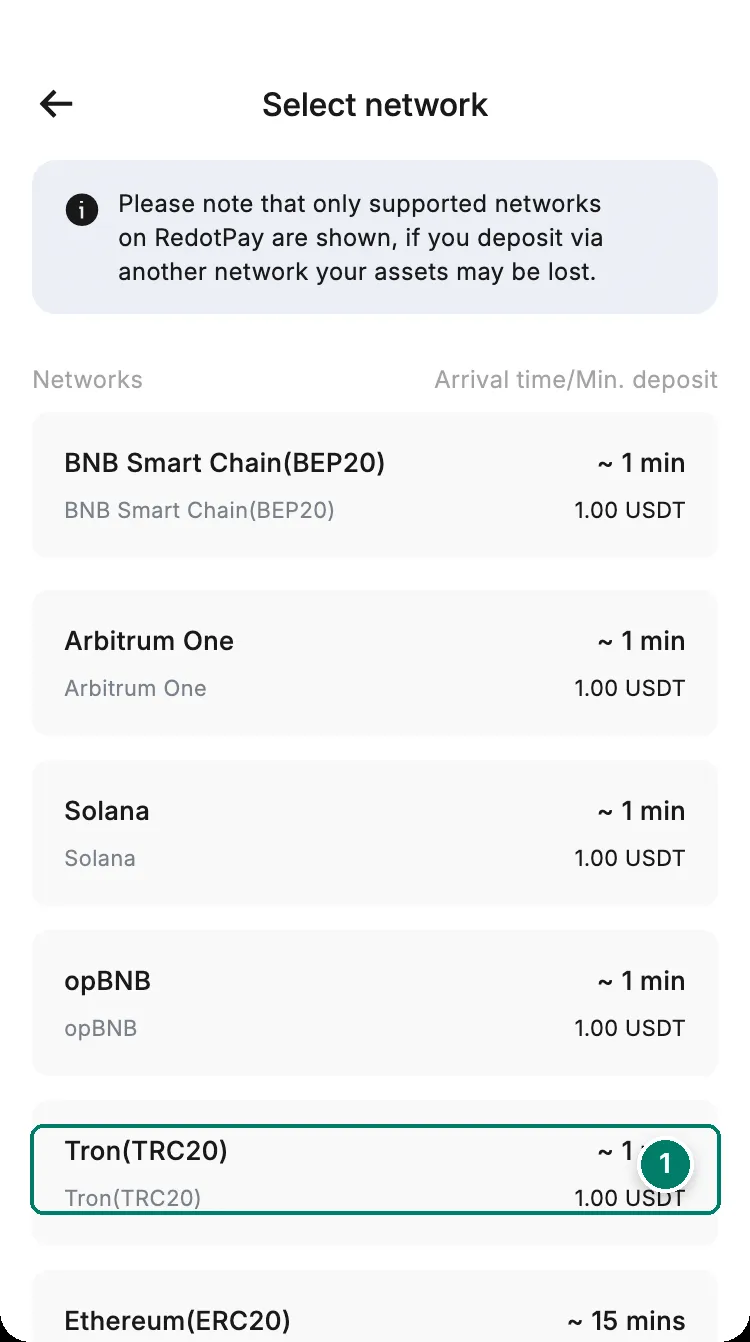
- Tron (TRC20) is the common choice: about one minute to arrive and the lowest withdrawal fees on most exchanges.
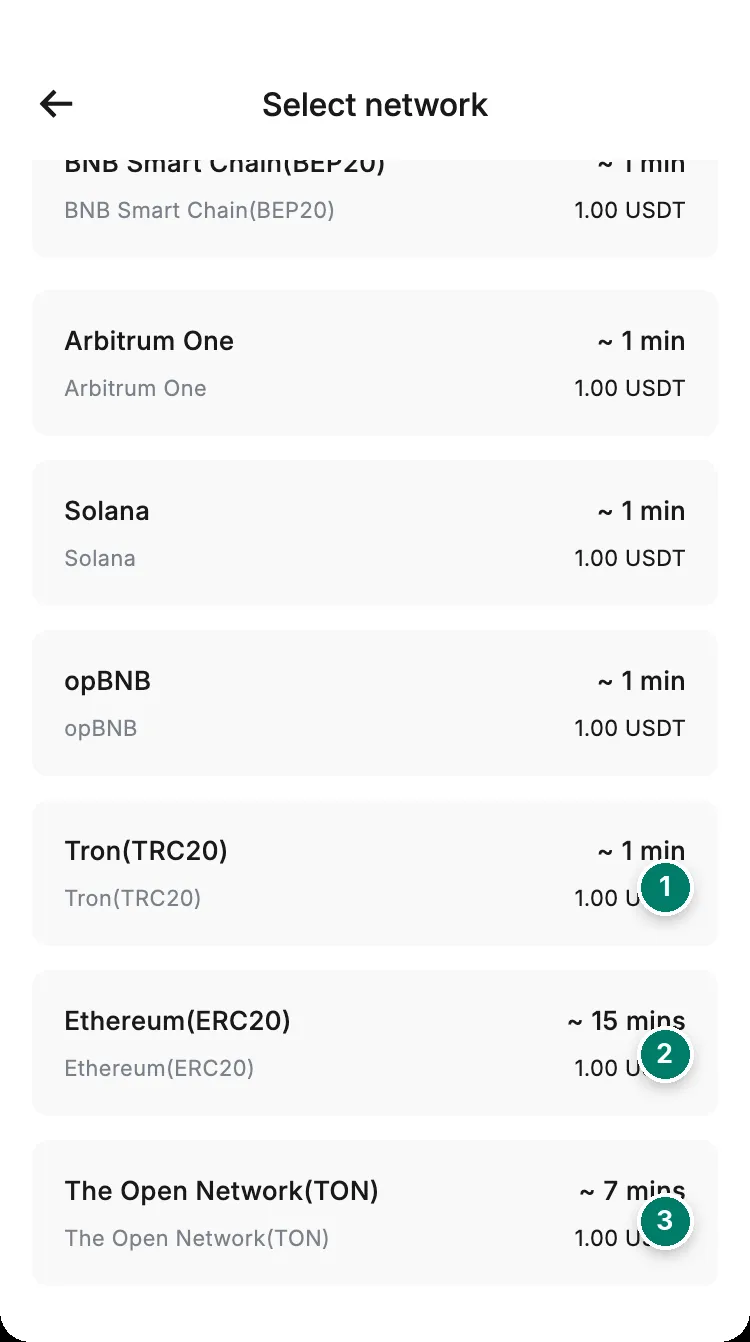
- Tron (TRC20): about 1 minute.
- Ethereum (ERC20): about 15 minutes, and the highest sending fees.
- The Open Network (TON): about 7 minutes.
| Network | Arrival time shown in app | Minimum deposit |
|---|---|---|
| BNB Smart Chain (BEP20) | ~1 min | 1 USDT |
| Arbitrum One | ~1 min | 1 USDT |
| Solana | ~1 min | 1 USDT |
| opBNB | ~1 min | 1 USDT |
| Tron (TRC20) | ~1 min | 1 USDT |
| Ethereum (ERC20) | ~15 min | 1 USDT |
| The Open Network (TON) | ~7 min | 1 USDT |
Step 5: Copy the address
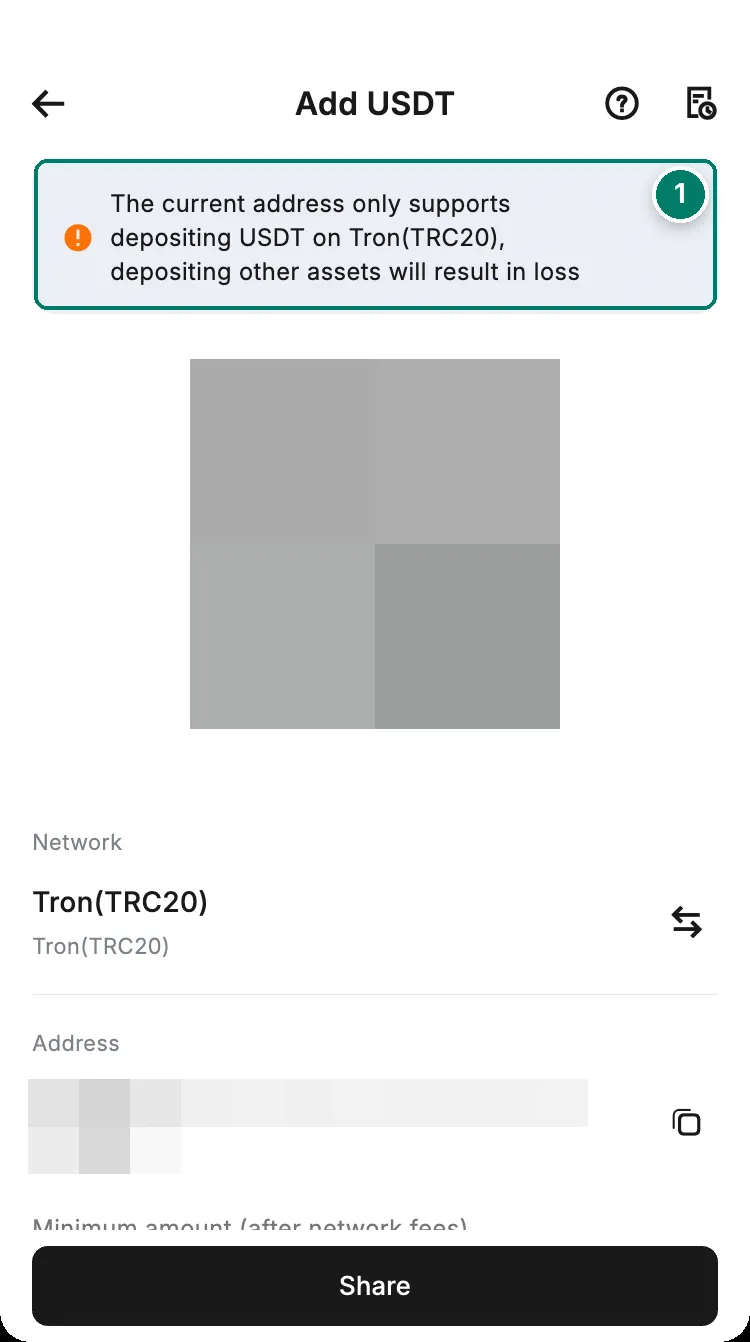
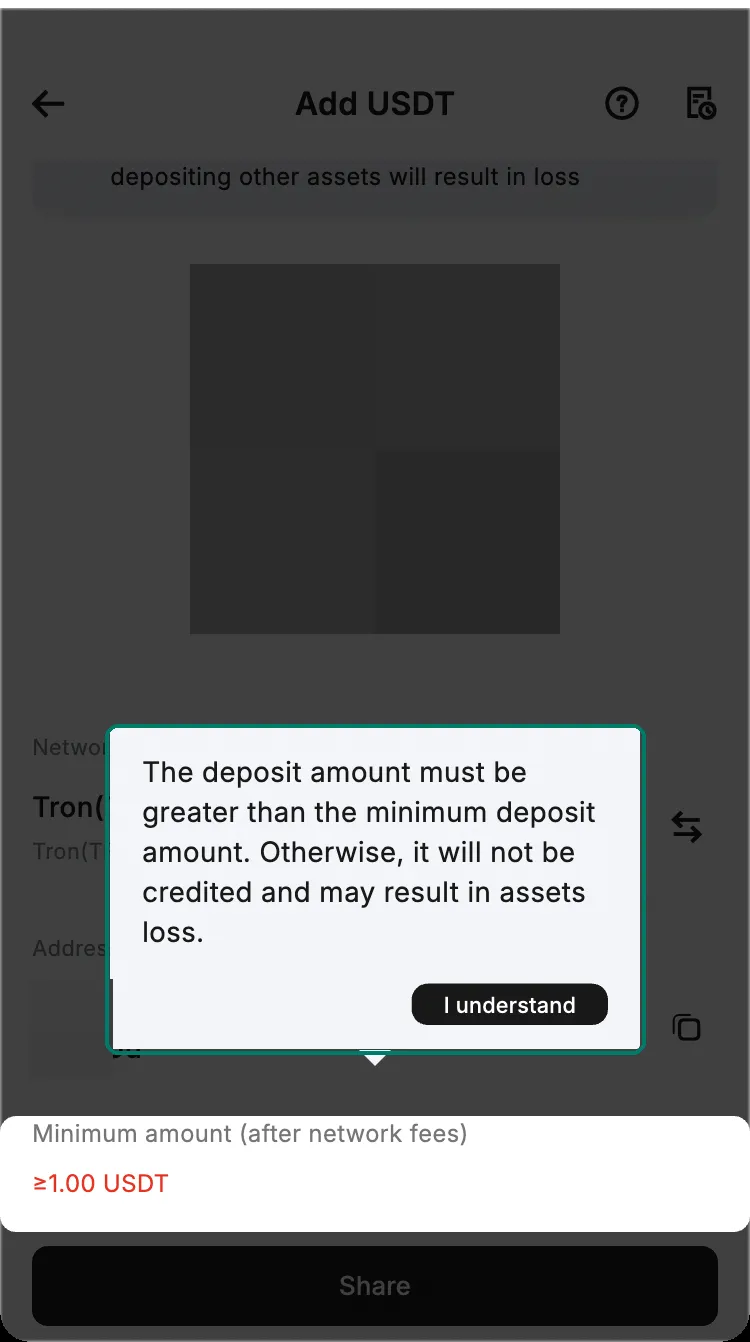
- Read the notice: this address accepts only USDT on the network you picked. Other coins sent here are lost.
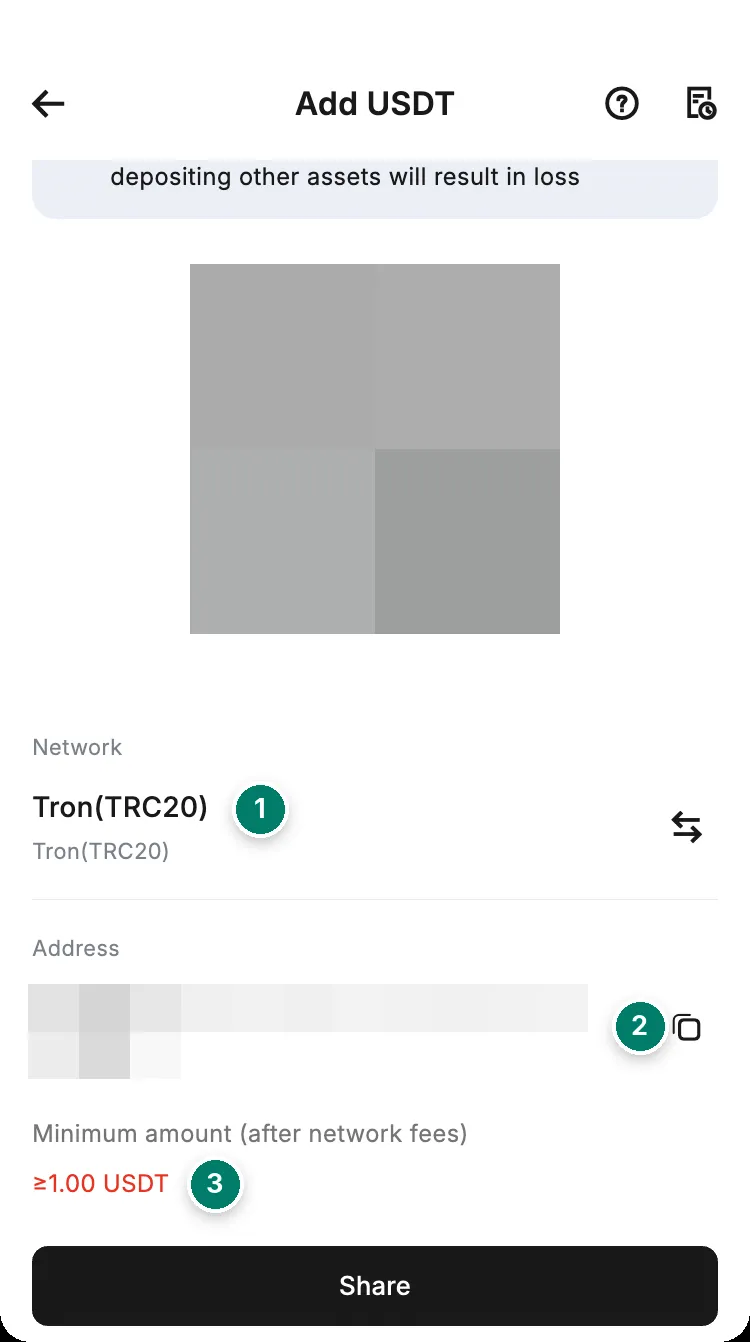
- Check the network name once more.
- Tap the copy icon, or scan the QR code from your wallet app.
- Minimum amount after network fees: 1 USDT. Less than that is not credited.
Step 6: Send from your wallet or exchange
- Open the withdrawal screen of your exchange or wallet and choose USDT.
- Choose the same network you picked in RedotPay (for example TRC20 on both sides).
- Paste the address. Compare the first four and last four characters with the app.
- For a first deposit, send a small test amount first, then the rest.
- Confirm. On Tron the balance usually updates within a minute or two.
Step 7: Check that it arrived
Go back to Assets. The USDT line shows the new balance, and the Home tab lists the transaction. If nothing shows after 30 minutes on a fast network, find the transaction hash on your exchange and contact support from inside the app with that hash.
If something went wrong
- Sent below the minimum: the deposit sits uncredited. Send another deposit of the same coin on the same network that meets the minimum; both are then credited together.
- Wrong network: contact support with the transaction hash immediately. Recovery is not guaranteed and may not be possible.
- Wrong coin to this address: same as above, and treat it as likely lost.
- “Pending” for a long time on Ethereum: network congestion; ERC20 can take longer than the 15 minutes shown.
Deposit hasn’t arrived
Most deposits land within 1 to 15 minutes. Before you write to support, check these in order:
- The status in the app. Open Deposit, then the History icon at the top right: every deposit is listed there with its status.
- The blockchain. Paste the transaction hash (TXID) from your exchange into a block explorer for that network. RedotPay needs at least one confirmation, and a congested network, Ethereum above all, can take longer than the time shown in the app. If the explorer still shows it pending, nothing is wrong yet.
- The coin and the network. A deposit in an unsupported coin or on the wrong network isn’t credited automatically. See wrong network: recovery, when it’s possible, takes 7 to 15 business days and carries a fee.
- The amount. Below the minimum, after your exchange’s fee, nothing is credited; top it up as described above.
- Sent from several addresses? RedotPay says a deposit arriving from more than one address can take 3 to 5 days to process.
- Flagged by a security check. RedotPay screens every transaction (it calls this KYT, Know Your Transaction). A deposit linked to a restricted or high-risk source, or an unusual pattern such as withdrawing straight after depositing, can be held for review, and RedotPay may ask for documents. See money held for review.
When to contact support: the explorer has shown the transaction confirmed on the right network for 30 minutes or more and History still shows nothing, or the deposit has sat in review for days. Send the TXID, the network, the coin, the amount and a screenshot of the explorer; without the TXID, support can’t trace it. See contact support.
Fees
Deposits are free on RedotPay’s side. The only cost is the network or withdrawal fee charged by the platform you send from, which is why most people pick TRC20 or BEP20.